How to Make Your Own Photovoltaic Cells
Introduction
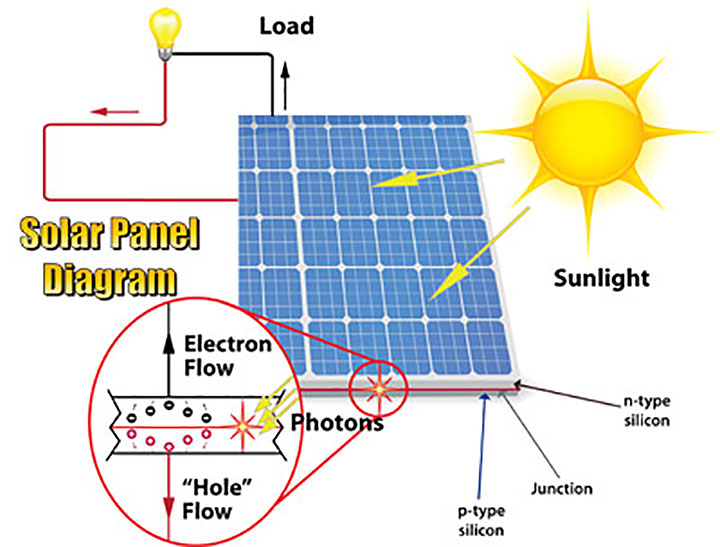
Photovoltaic cells, also known as solar cells, are devices that convert sunlight into electricity. These cells are typically made from silicon and other materials, and are a key component in solar panels. If you’re interested in renewable energy and want to create your own photovoltaic cells, you’ve come to the right place. In this article, we’ll provide a step-step guide on how to make your ownovoltaic cells at home.Materials Needed
Before you get started, it’s important to gather all the necessary materials for this project. Here’s a list of items you’ll need to make your own photovoltaic cells: 1. Silicon wafers 2. Phosphorus oxychloride 3. Ethanol 4. Hydrochloric acid 5. Titanium dioxide 6. Ruthenium dye 7. Glass or plastic substrate 8. Conductive glass 9. Masking tape 10. Gloves and safety gogglesStep 1: Preparing the Silicon Wafer
The first step in making your own photovoltaic cells is to prepare the silicon wafer. Start by cleaning the silicon wafer with ethanol to remove any impurities. Next, place the wafer in a container and add a small amount of phosphorus oxychloride. This will form a layer of phosphorous on the surface of the wafer, which is essential for the functioning of the cell.Step 2: Creating the Semiconductor Junction
After preparing the silicon wafer, the next step is to create the semiconductor junction. This is done by heating the wafer in a furnace at high temperatures. This process will form a layer of phosphorous silicate glass on the surface of the wafer, which will create the necessary p-n junction for the cell.